My Magic Mirror
I had some time this holiday season and wanted to try a different project, so I decided to take a stab at making my own magic mirror. This would be my first wood-working project since I was a child, so a trip to Home Depot was in order.
Parts
Here's a list of the tools I needed to purchase:
- Clamps.. many clamps
- Handsaw and miter box
- Some solid oak boards. I ended up buying 2x 1.5 by 0.25" and 2x 2.5 by 0.5".
- Wood glue
- Right angle
- Stain and sealer
- Metal brackets (Which I used to hold the monitor in place)
- Pocket hole and 3/4" pocket screws
- I already had a drill, but you'll need to purchase one if you don't already have one
In addition to the tools, the basic set of parts I used:
- A 24" Spectre monitor (See below)
- 12x24" acrylic mirror (See below)
- Raspberry Pi 3b+
- PIR Motion sensor
- 3-outlet power adapter, which will be mounted internally
- Thin Pi Power Adapter
- USB Extension Jack - Which I'll mount on the bottom to access the pi
Choosing components
I spent a long time choosing which monitor and mirror to buy for this project, but for each, one thing ended up swaying me.
The Monitor
I aimed for a monitor that had a low-profile (these days, ultra-thin monitors are pretty cheap and easy to find). I landed on a cheap spectre for a few reasons:
- Thin profile
- Not IPS (Not as much light blead)
- Built in speakers (Not great sound quality, but that doesn't bother me.. no cheap monitor has great sound quality)
- HDMI port
- Stand can easily come off (Has VESA mount)
This ended up being fine, but it's worth noting two things:
- The power adapter is huge
- The ports on the back come out perpendicular to the monitor
This just meant I had to buy a right-angle HDMI cable. Everything else was fine.
If you do this, I would recommend seeing if you can find one that has the ports coming out of the bottom, but overall I feel like this was a good buy.
The Mirror
I went back and forth between a cheap acrylic or an expensive ($100+) glass one-way mirror. Both risked breaking in the mail, and all the reviews said that glass looks way nicer. With that said, since this was my first project, I wasn't confident that I wouldn't end up accidentally breaking it. I figured if I wanted to change it to glass in the future I could, so I went with the acrylic. At the end of the day, the acrylic reflects light a little less (meaning the reflection itself is a bit darker), but I'm still happy with it.
Building the frame
The first thing I did was sit down with a tape measure and create a sketchup model of what I wanted to build. I did this after I bought the monitor, but before I got anything else in order to make sure all the parts would fit in a reaonsable way and to figure out how much wood I needed to buy.
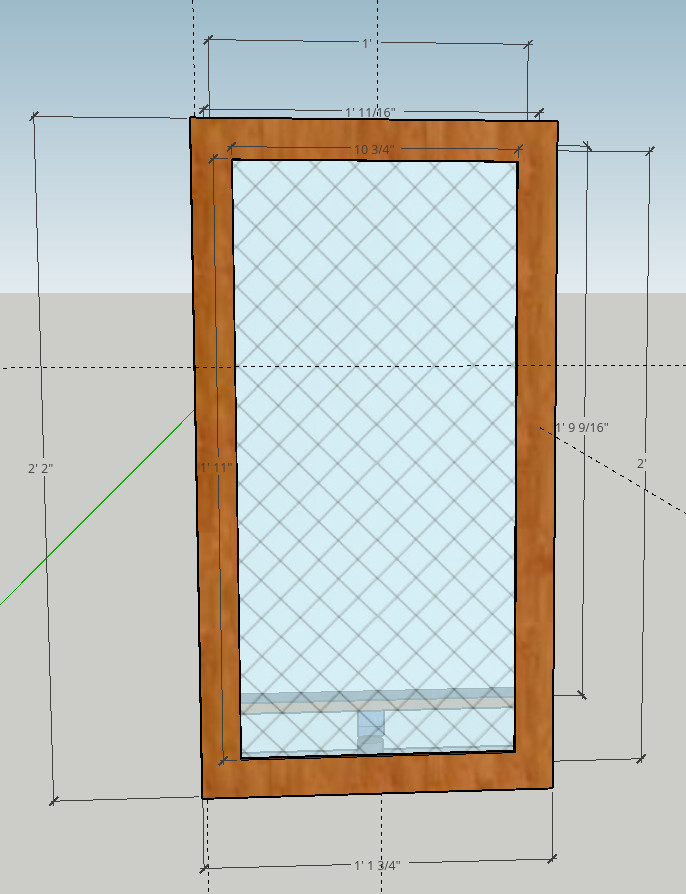
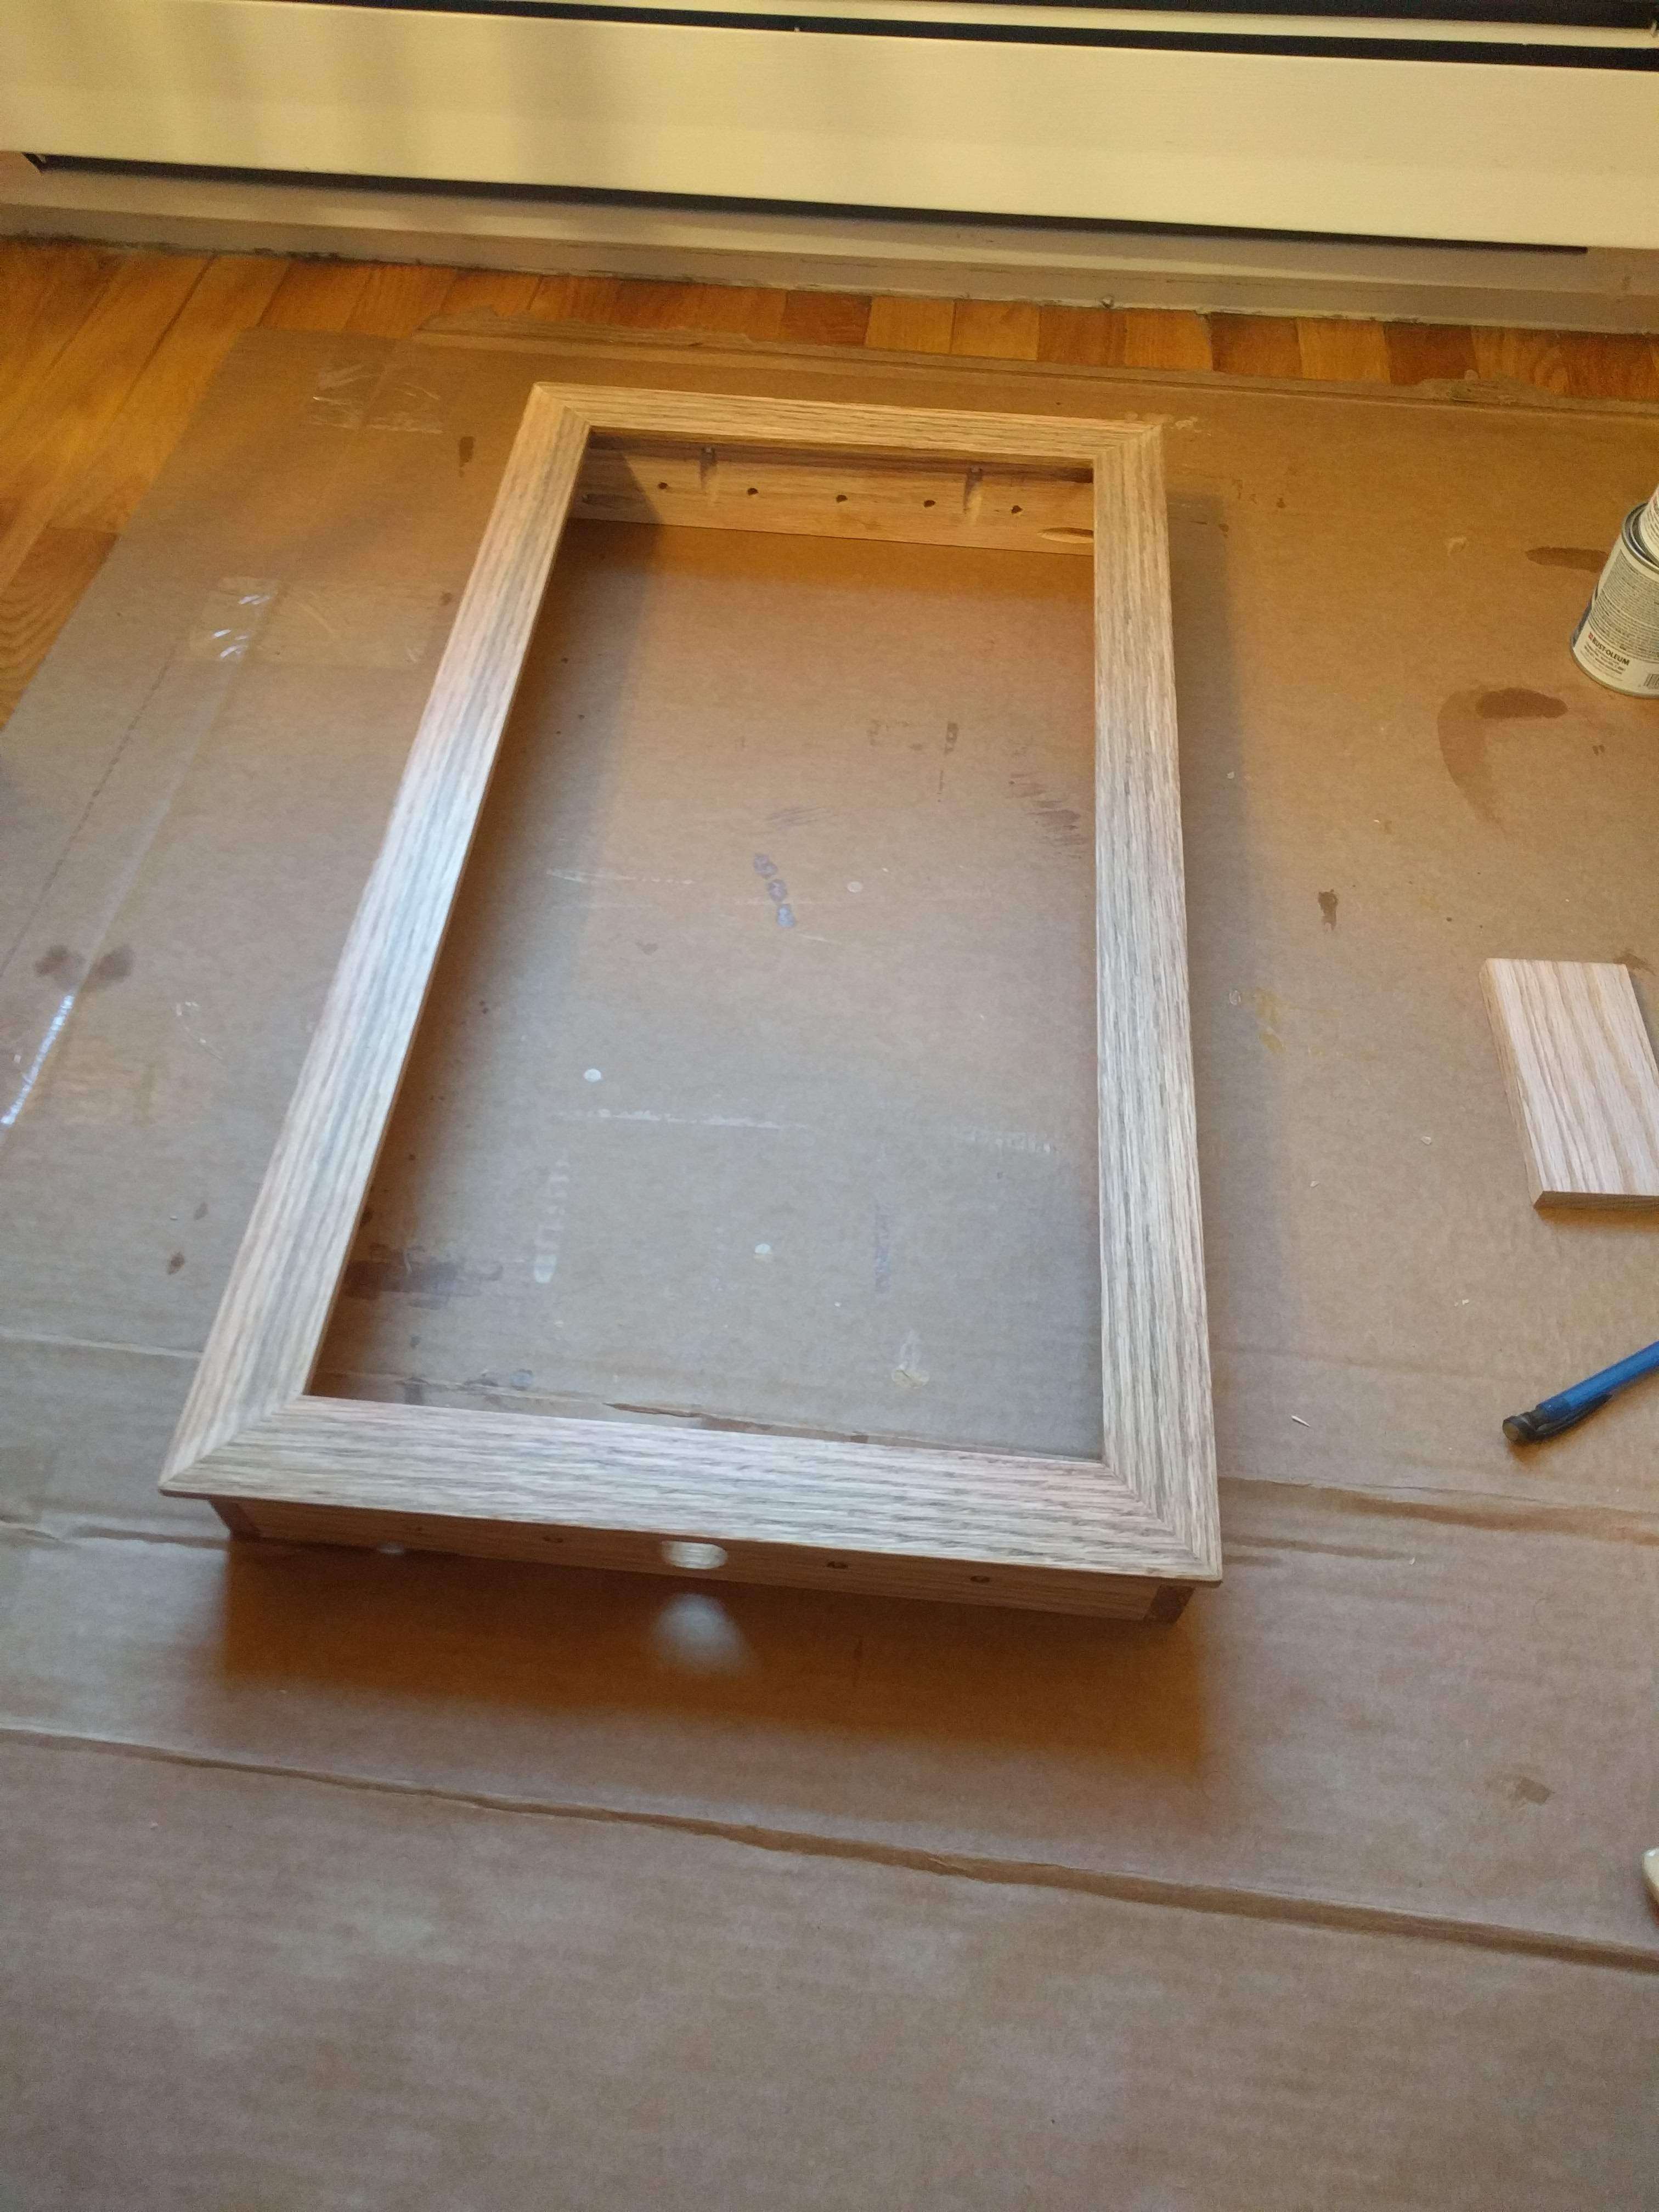
From there, I stared by building the outside of the frame that's visible from the front by taking my 1.5 by 0.25 sections of wood and cutting 45 degree angles at the proper lengths. It's worth noting that the mirror I bought was 24" tall, but the monitor was only 20", so I had to shimmy up the button to hold the monitor in place. I then glued the pieces together at the corners and let it dry overnight.

I didn't have a lot of space, so my workstation was an upside down Amazon box.
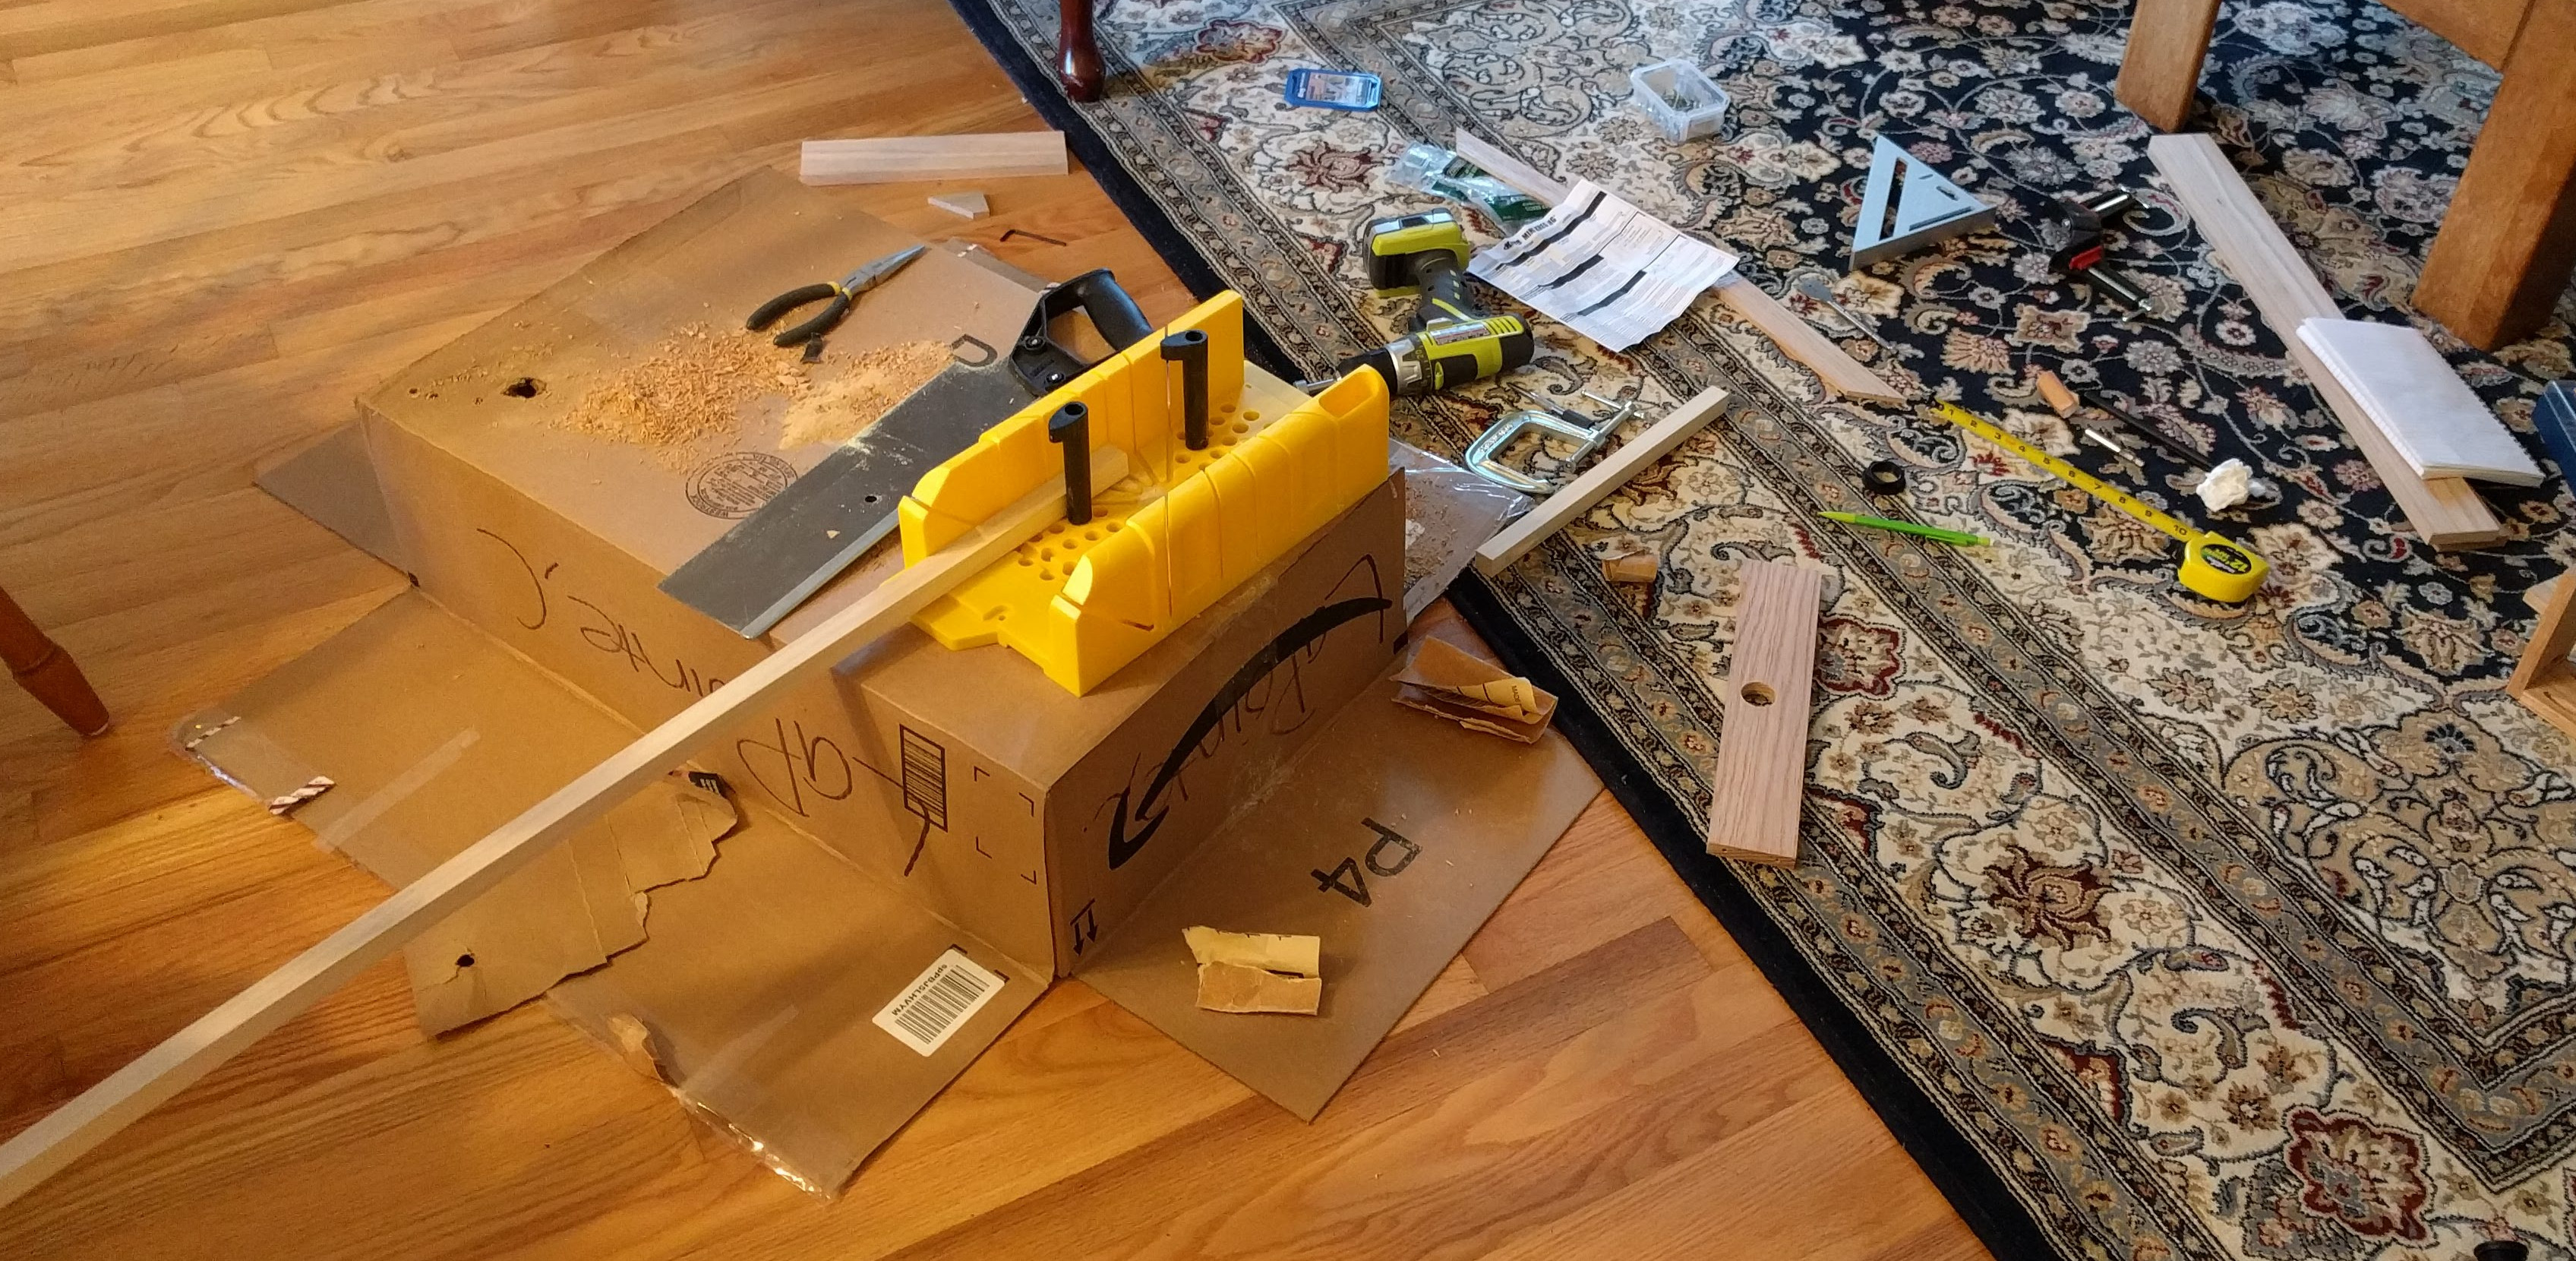
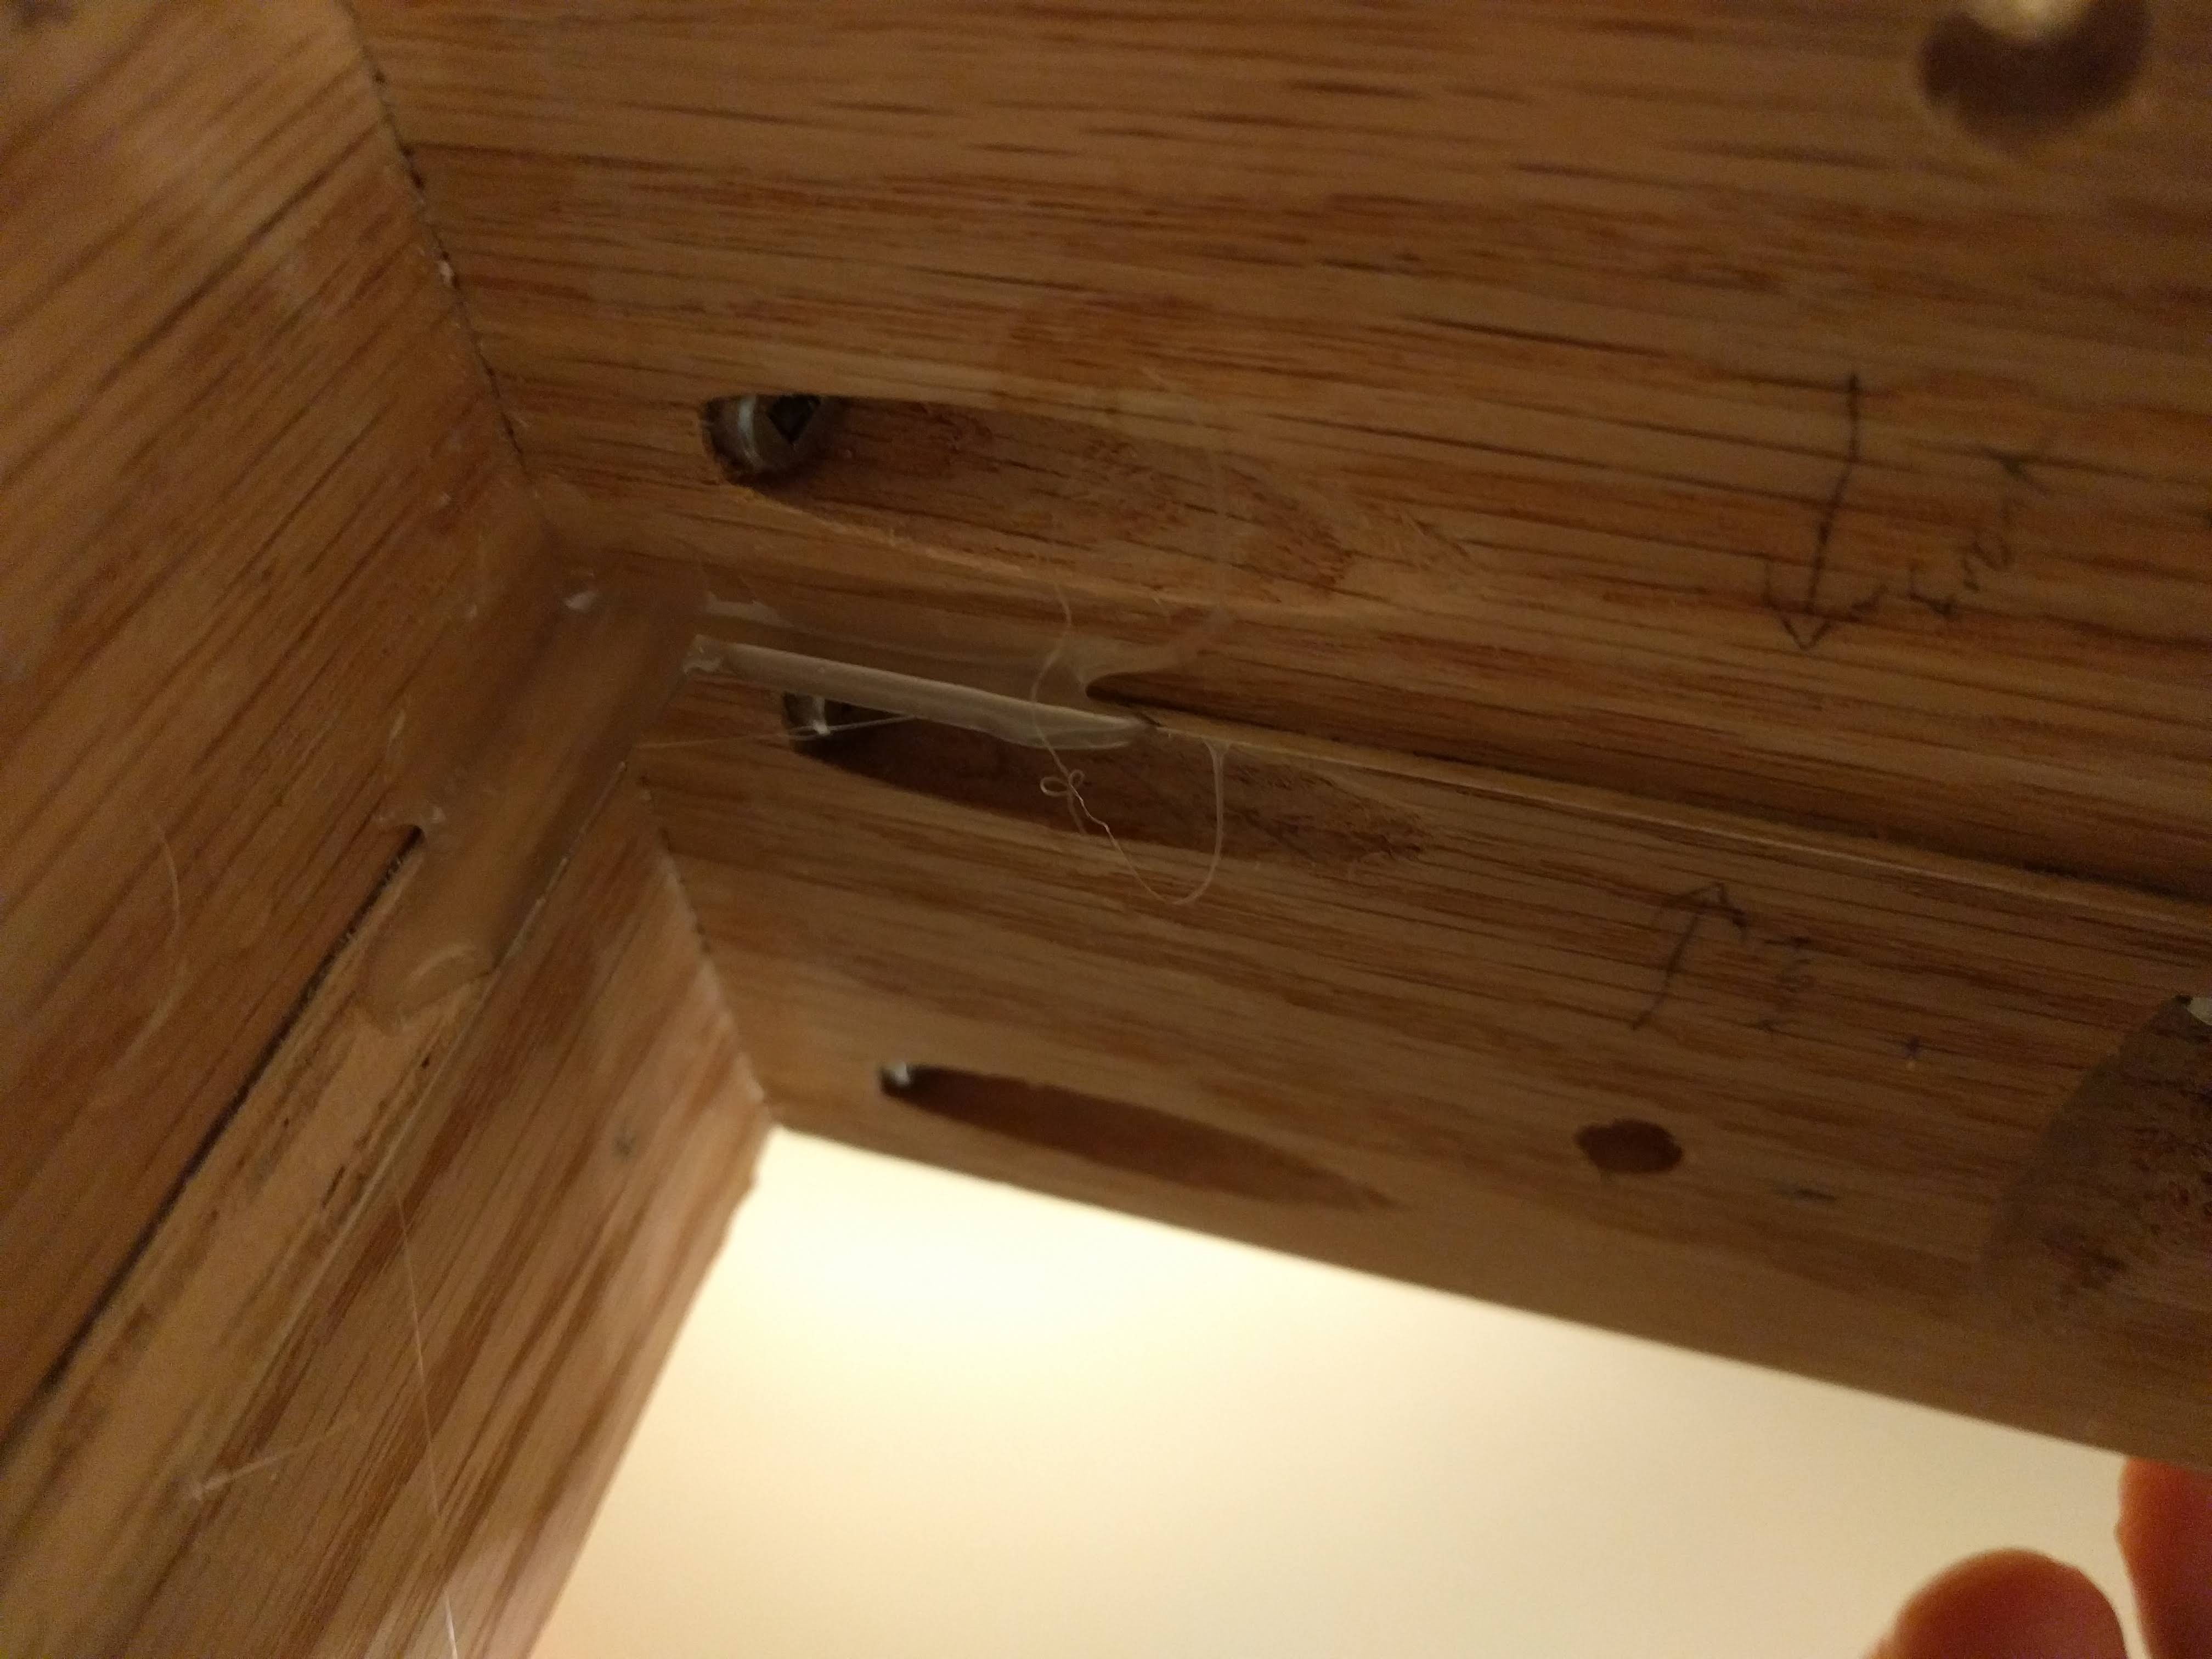
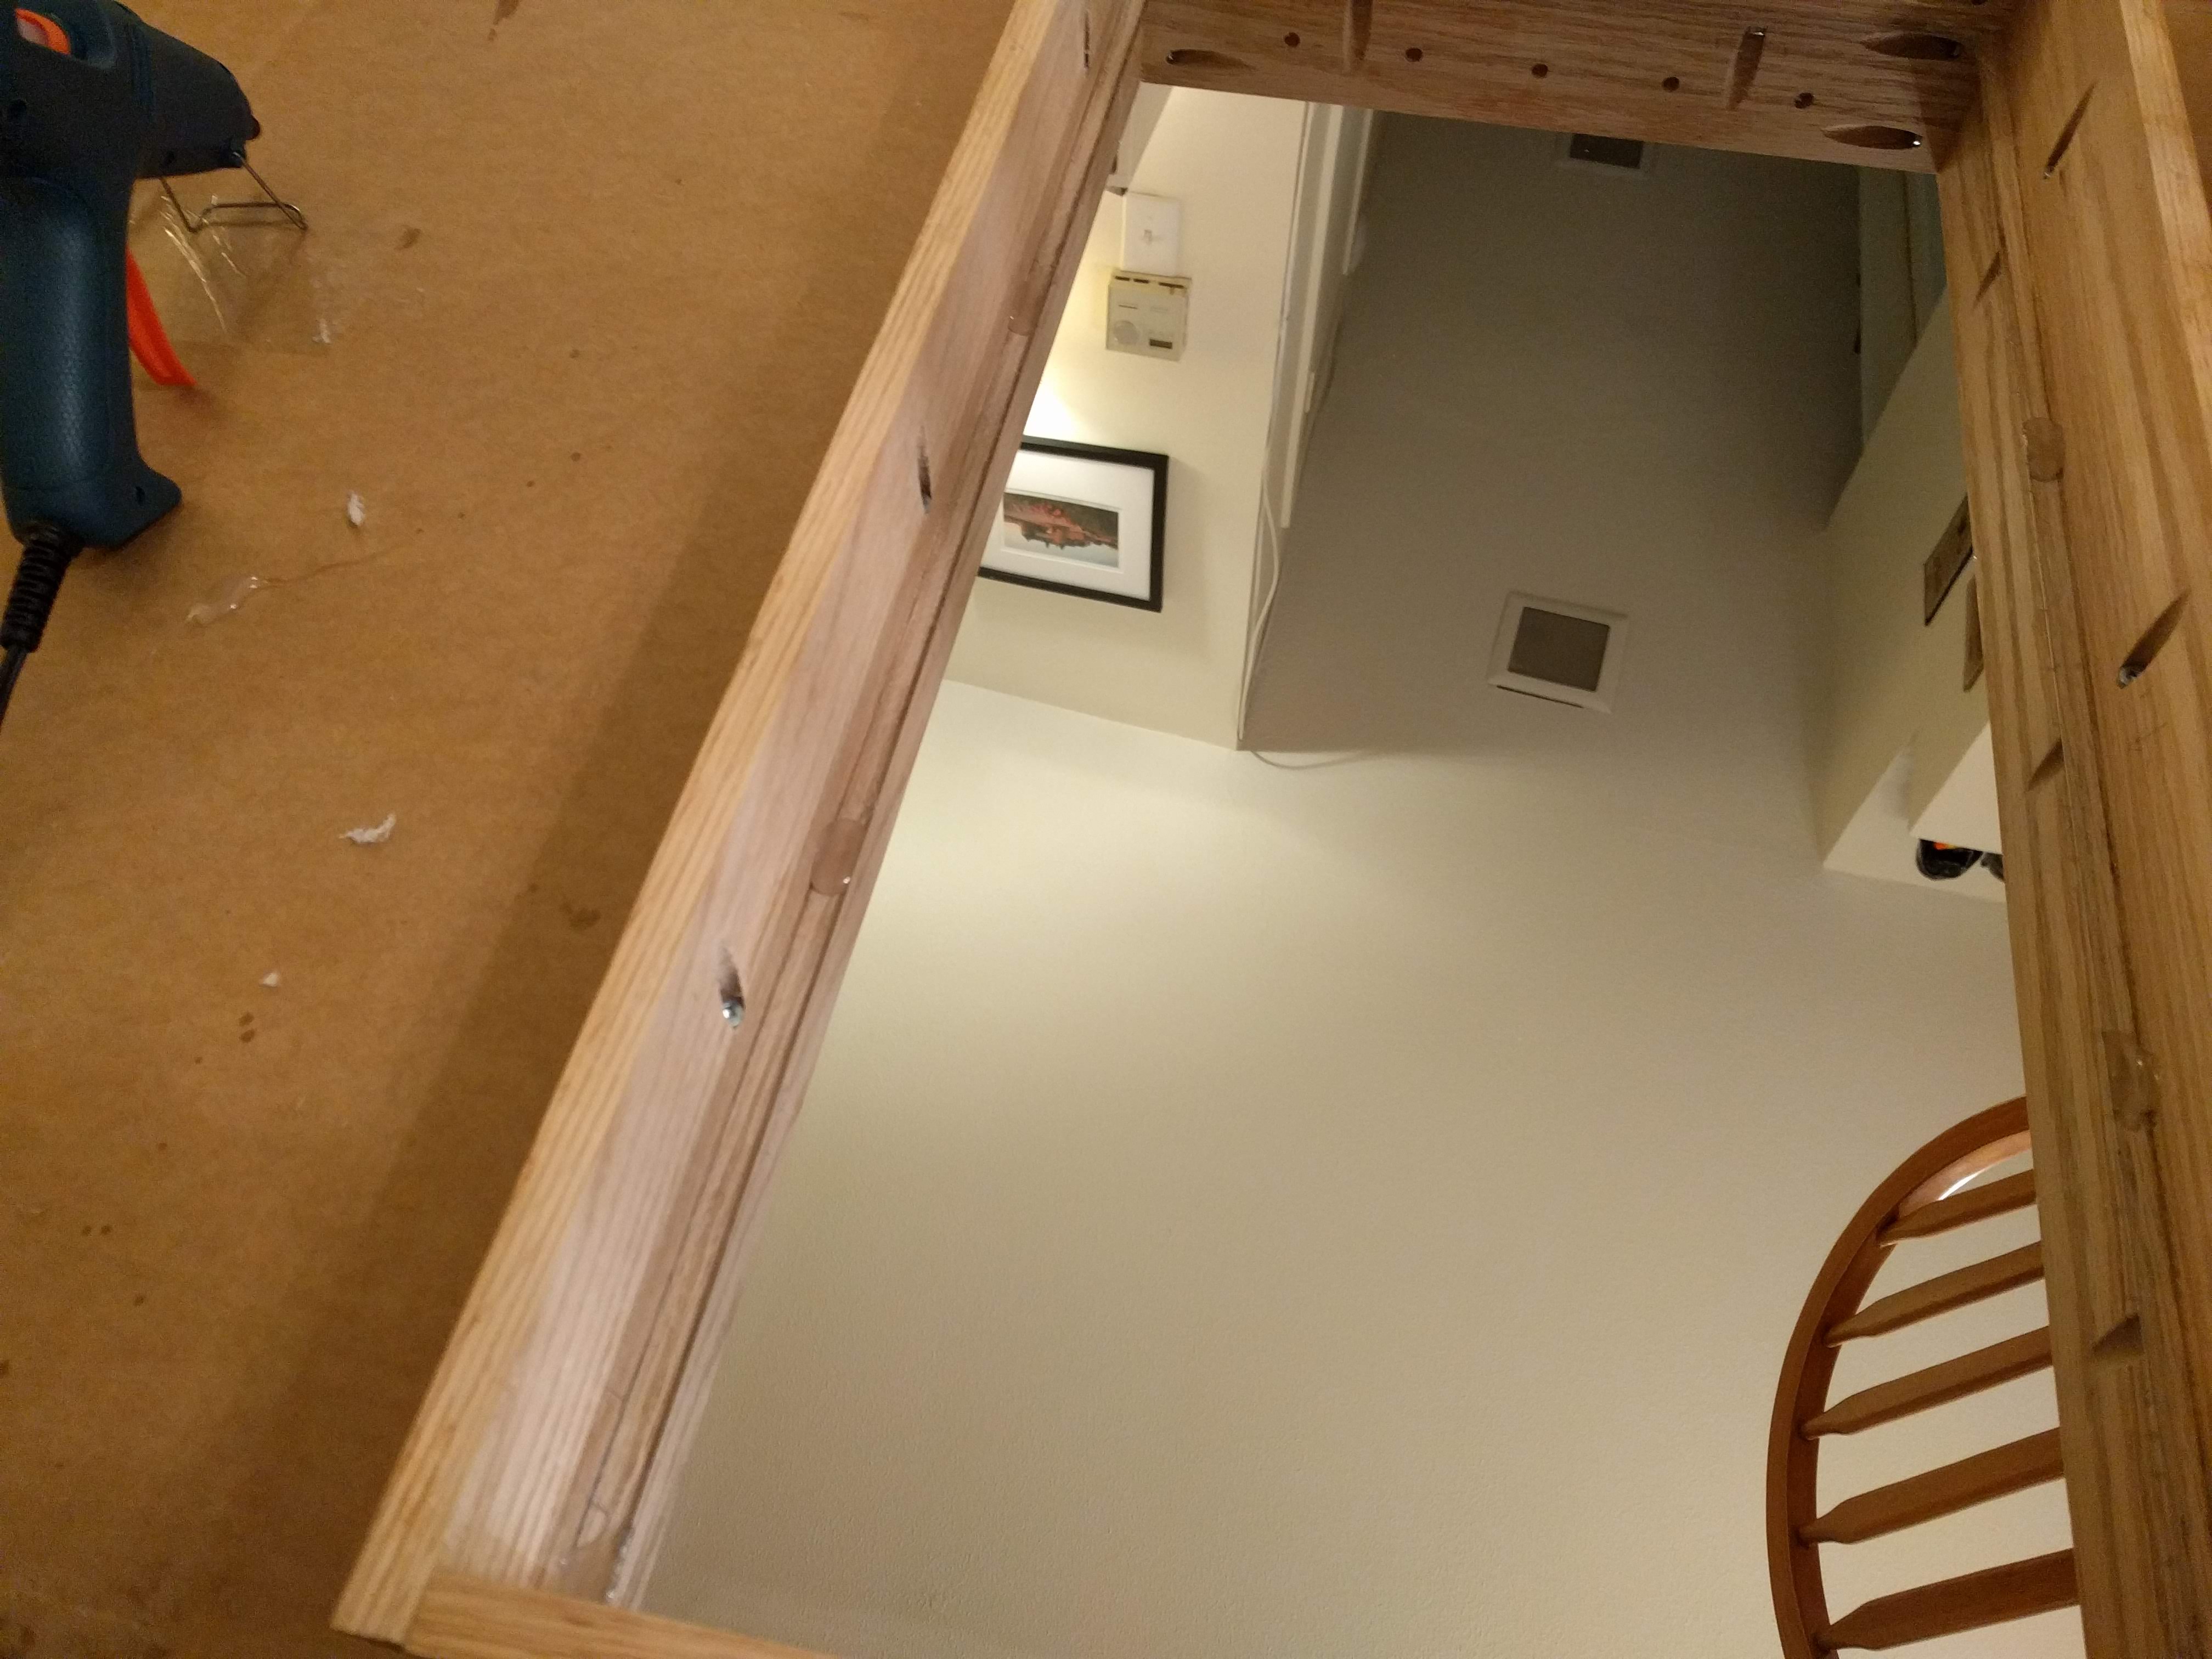
From there, I began building the outside of the frame that would house the monitor and mirror. This section needs to be strong since it will bear most of the weight. I used a pocket-hole to drill holes at angles on the inside of the material to make the outside of the mirror completely seamless. Once the holes were drilled, I connected the pieces with screws and glue.
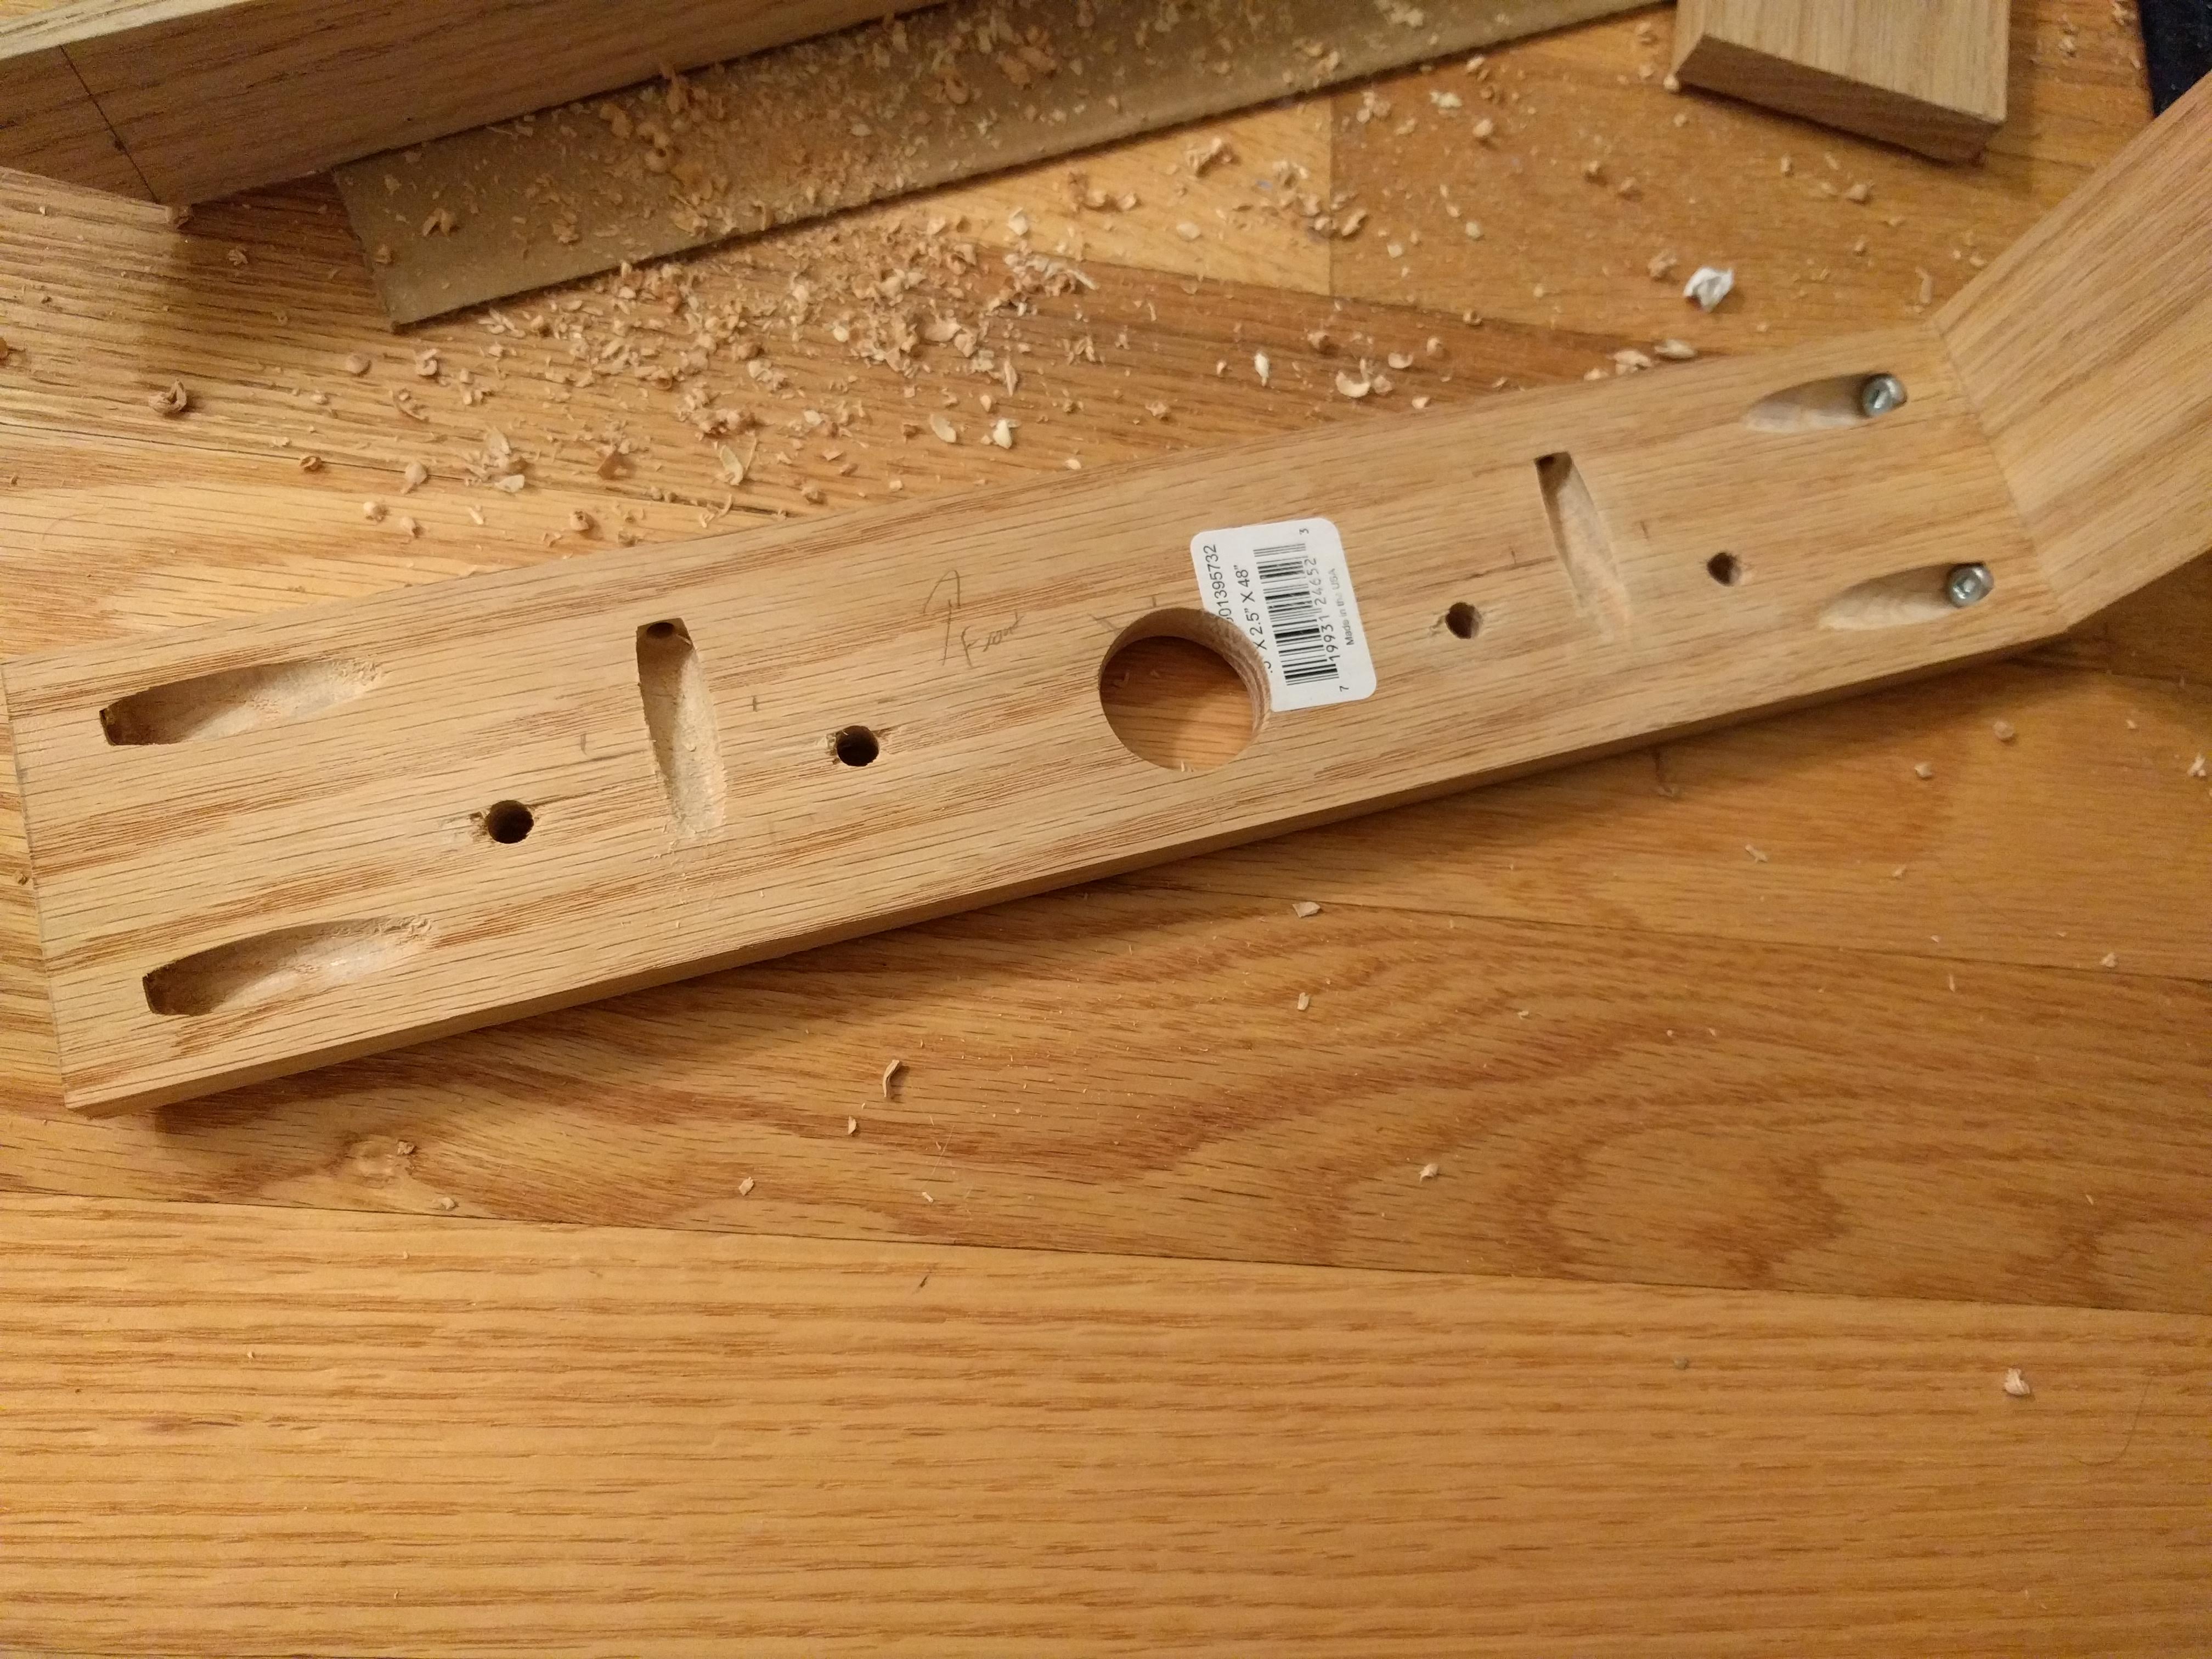
After building both parts separately, I attached the front and the sides together with more glue and screws with holes from my pocket-hole jig.
From there, all that was left to do was apply a nice stain (I chose natural wood color, which only darkened it a bit), and apply the sealer (Polyurethane). This took the better part of a day (especially since Boston's cold weather slowed the process down). If you do it indoors, make sure to have good ventilation!
Installing mirror and monitor
Once it was all together and dry, it was time to make sure everything fit:
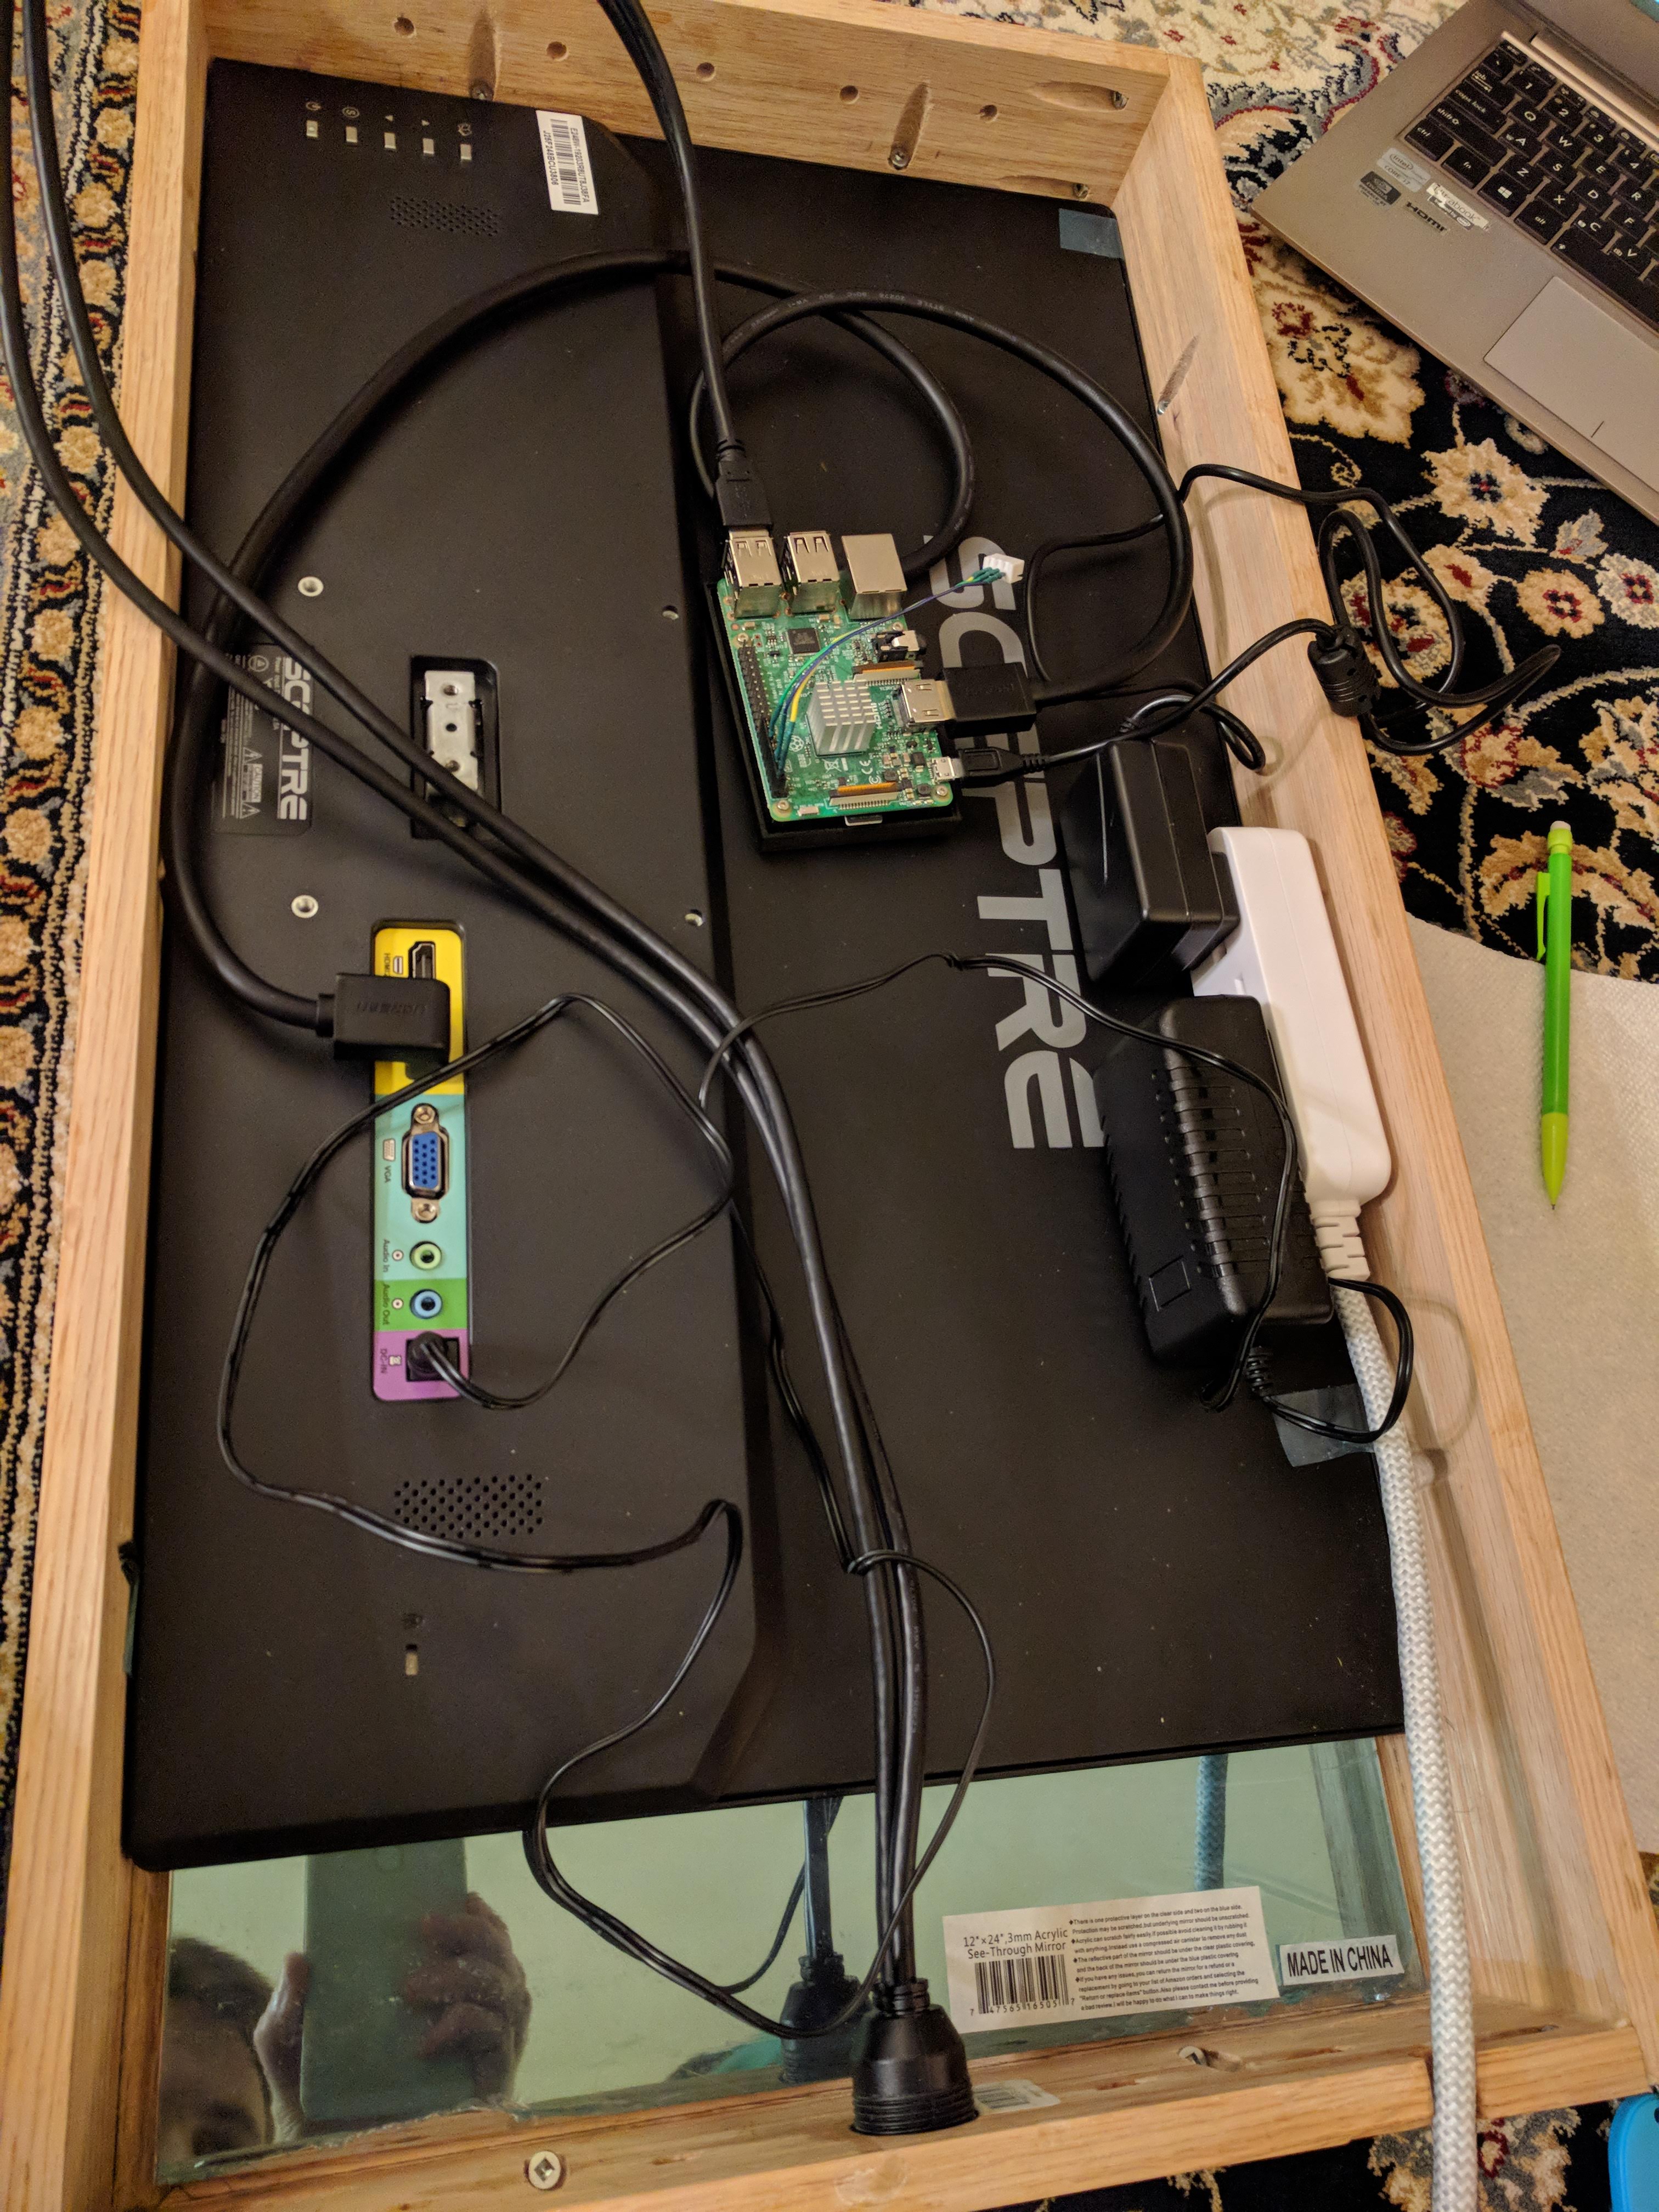
Afterwards, I removed all the protective film on the mirror and monitor, and started by adding 8 globs of hot glue to keep the mirror from wiggling. In my case, the mirror was slightly smaller than the monitor horizontally, but fit perfectly vertically, so it was just a matter of keeping it from wiggling. I used other parts to secure it (The monitor pressing on 90% of the mirror I figured was enough securing)
The mirror's in!
After the mirror, I put the monitor in, and used the combination of metal right-angles and another piece of wood I cut to secure it in place.
From there, there was more hot glue and some double-sided sticky-tape to secure the pi and power strip. I ended up having to buy a new pi power adapter so it would fit in the box, but that wasn't a big deal.
I also drilled some holes at the top and bottom to make sure it had some air circulation.
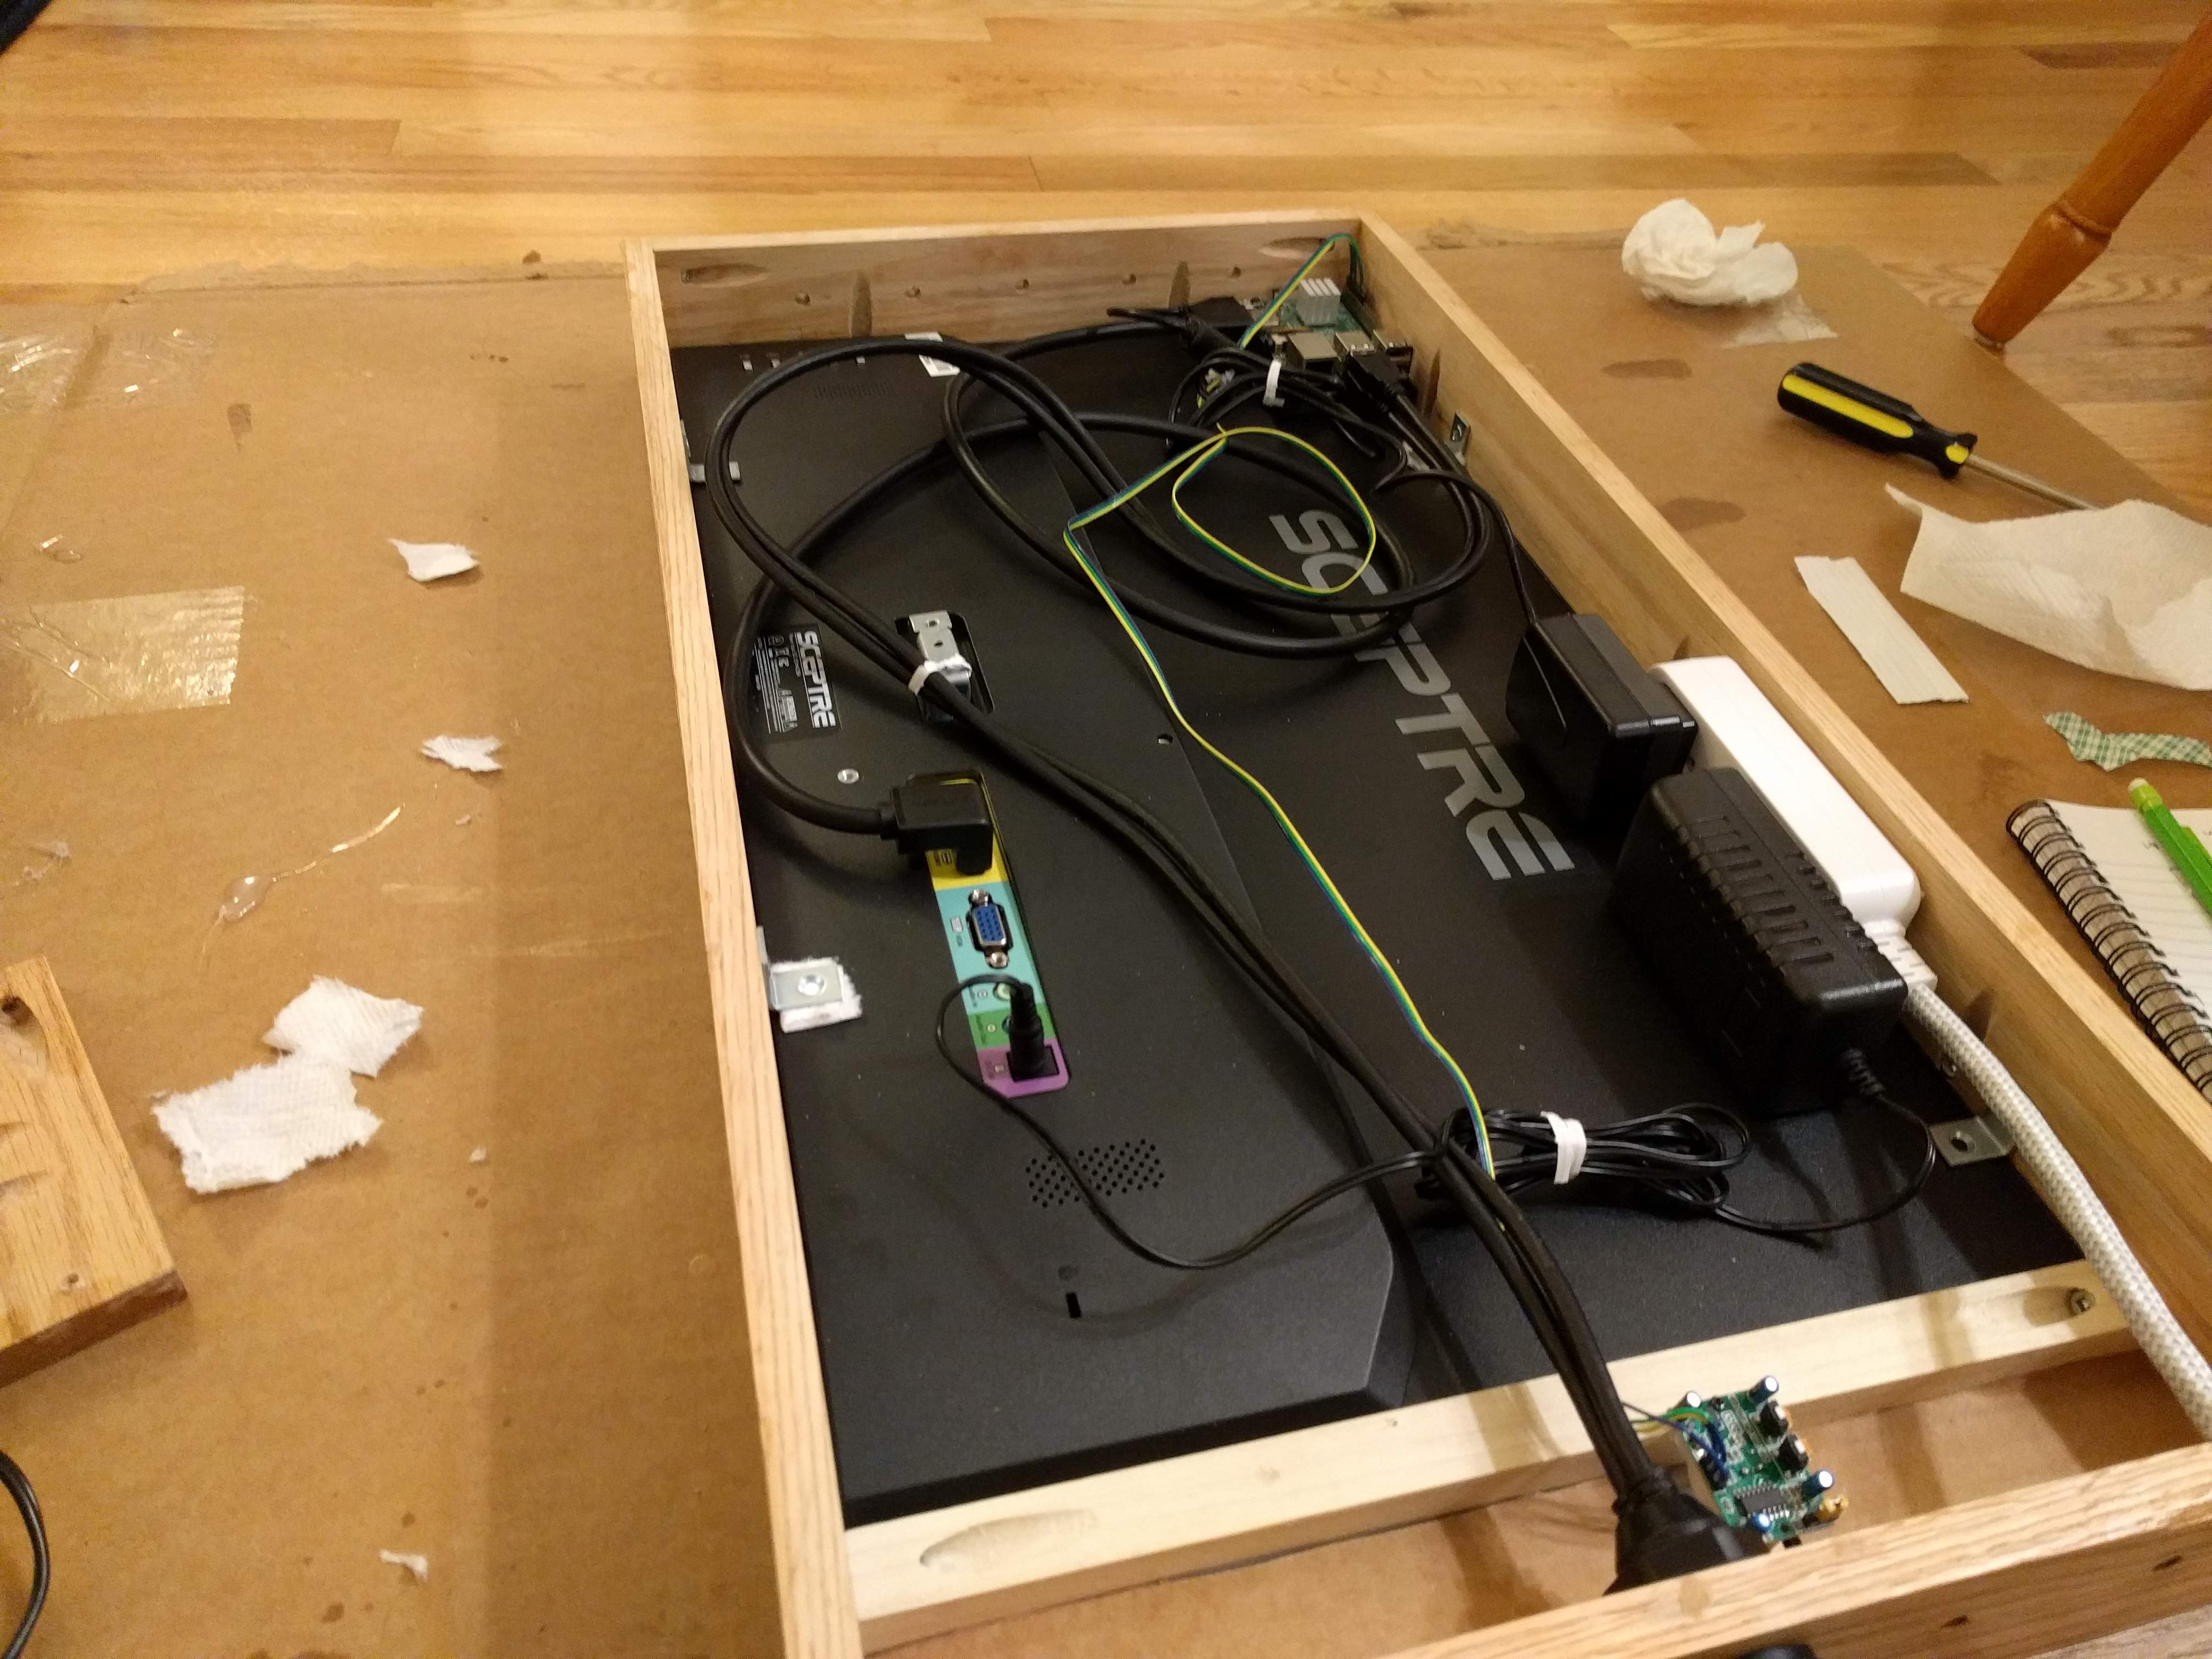
At this point, I figured out that PIR motion sensors don't work through the magic-mirror, so I removed the sensor and just used a bit of cardboard to block the light from the back of the mirror (I recommend painting the cardboard black if you do this), and it looks fine.
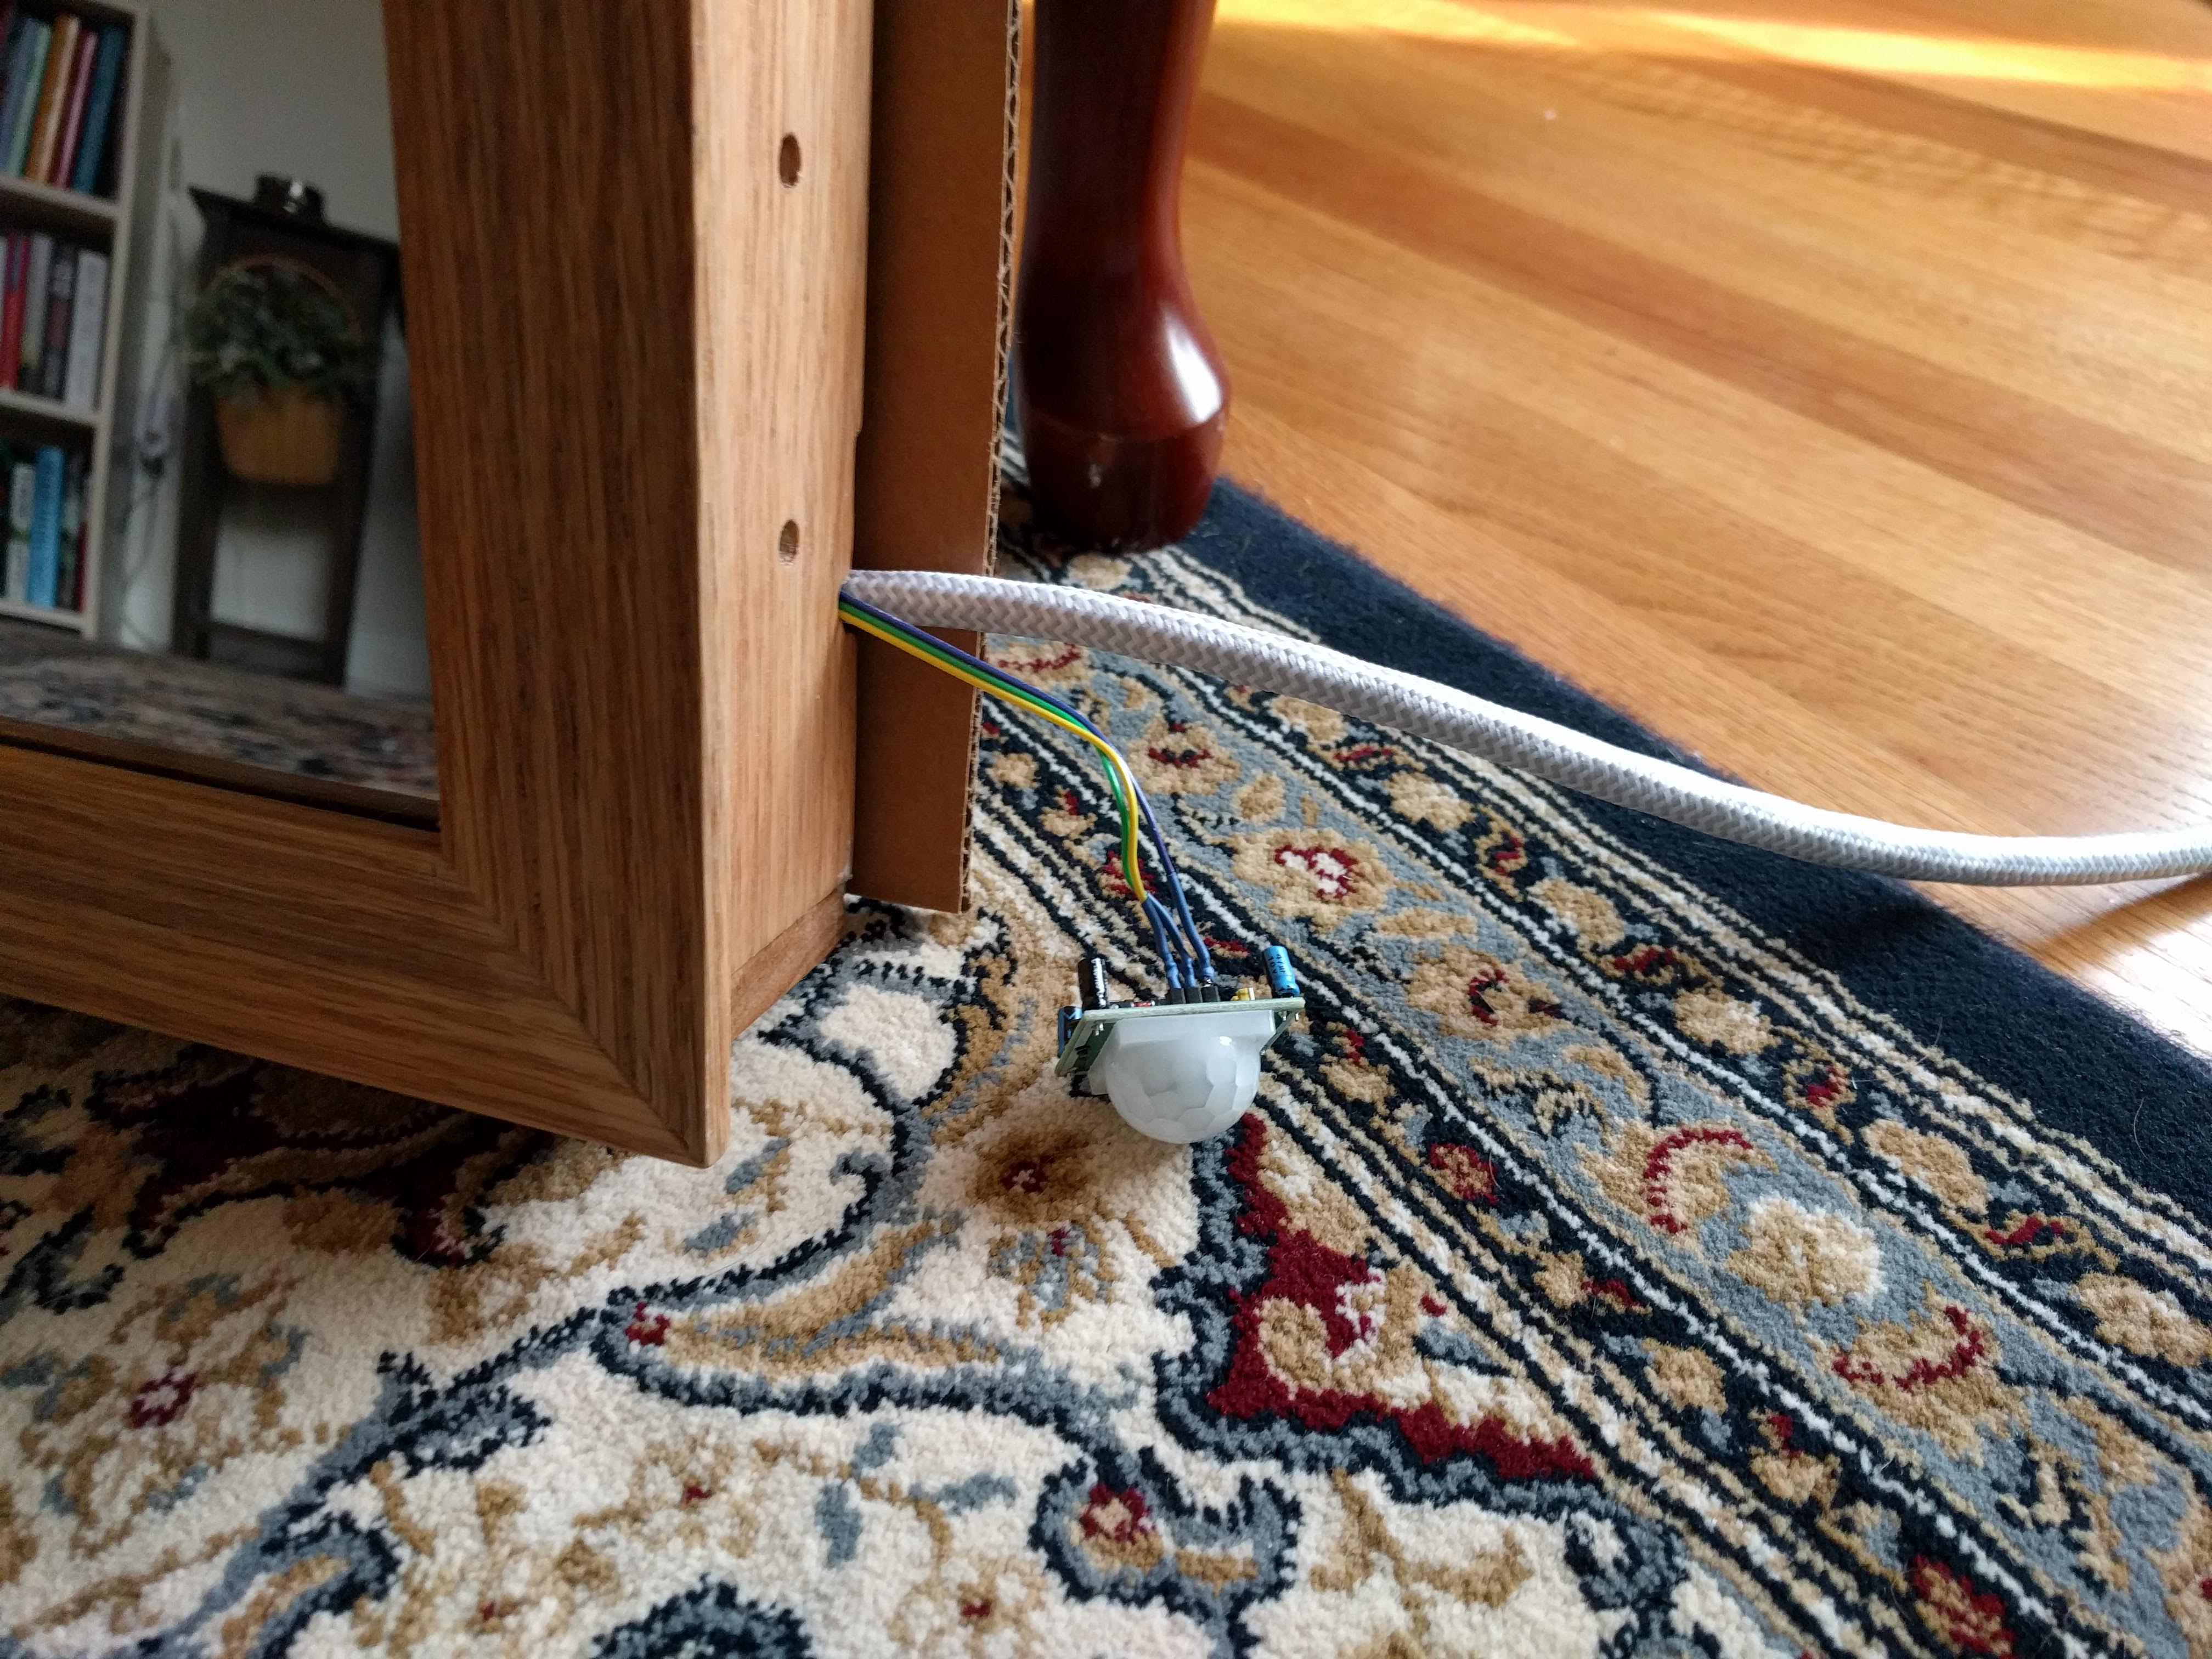
For now, the PIR sensor sticks out of the bottom, but I'm going to 3D print a little case for it so it looks less out-of-place.
Software
Alright, now that it's all together, it's time for some configuration. Like most projects, I installed MagicMirror2 on it. This was a super easy process for the most part.
One thing worth noting is that electron 2.x (The software MagicMirror uses for its display) doesn't work well with the Pi's graphics acceleration, so I ended up dropping the electron back down to 1.x (1.7 I think) and it worked fine. Hopefully that will be fixed by the time you do this project, but if not, this is the issue where I found some alternative solutions.
Magic Mirror Config
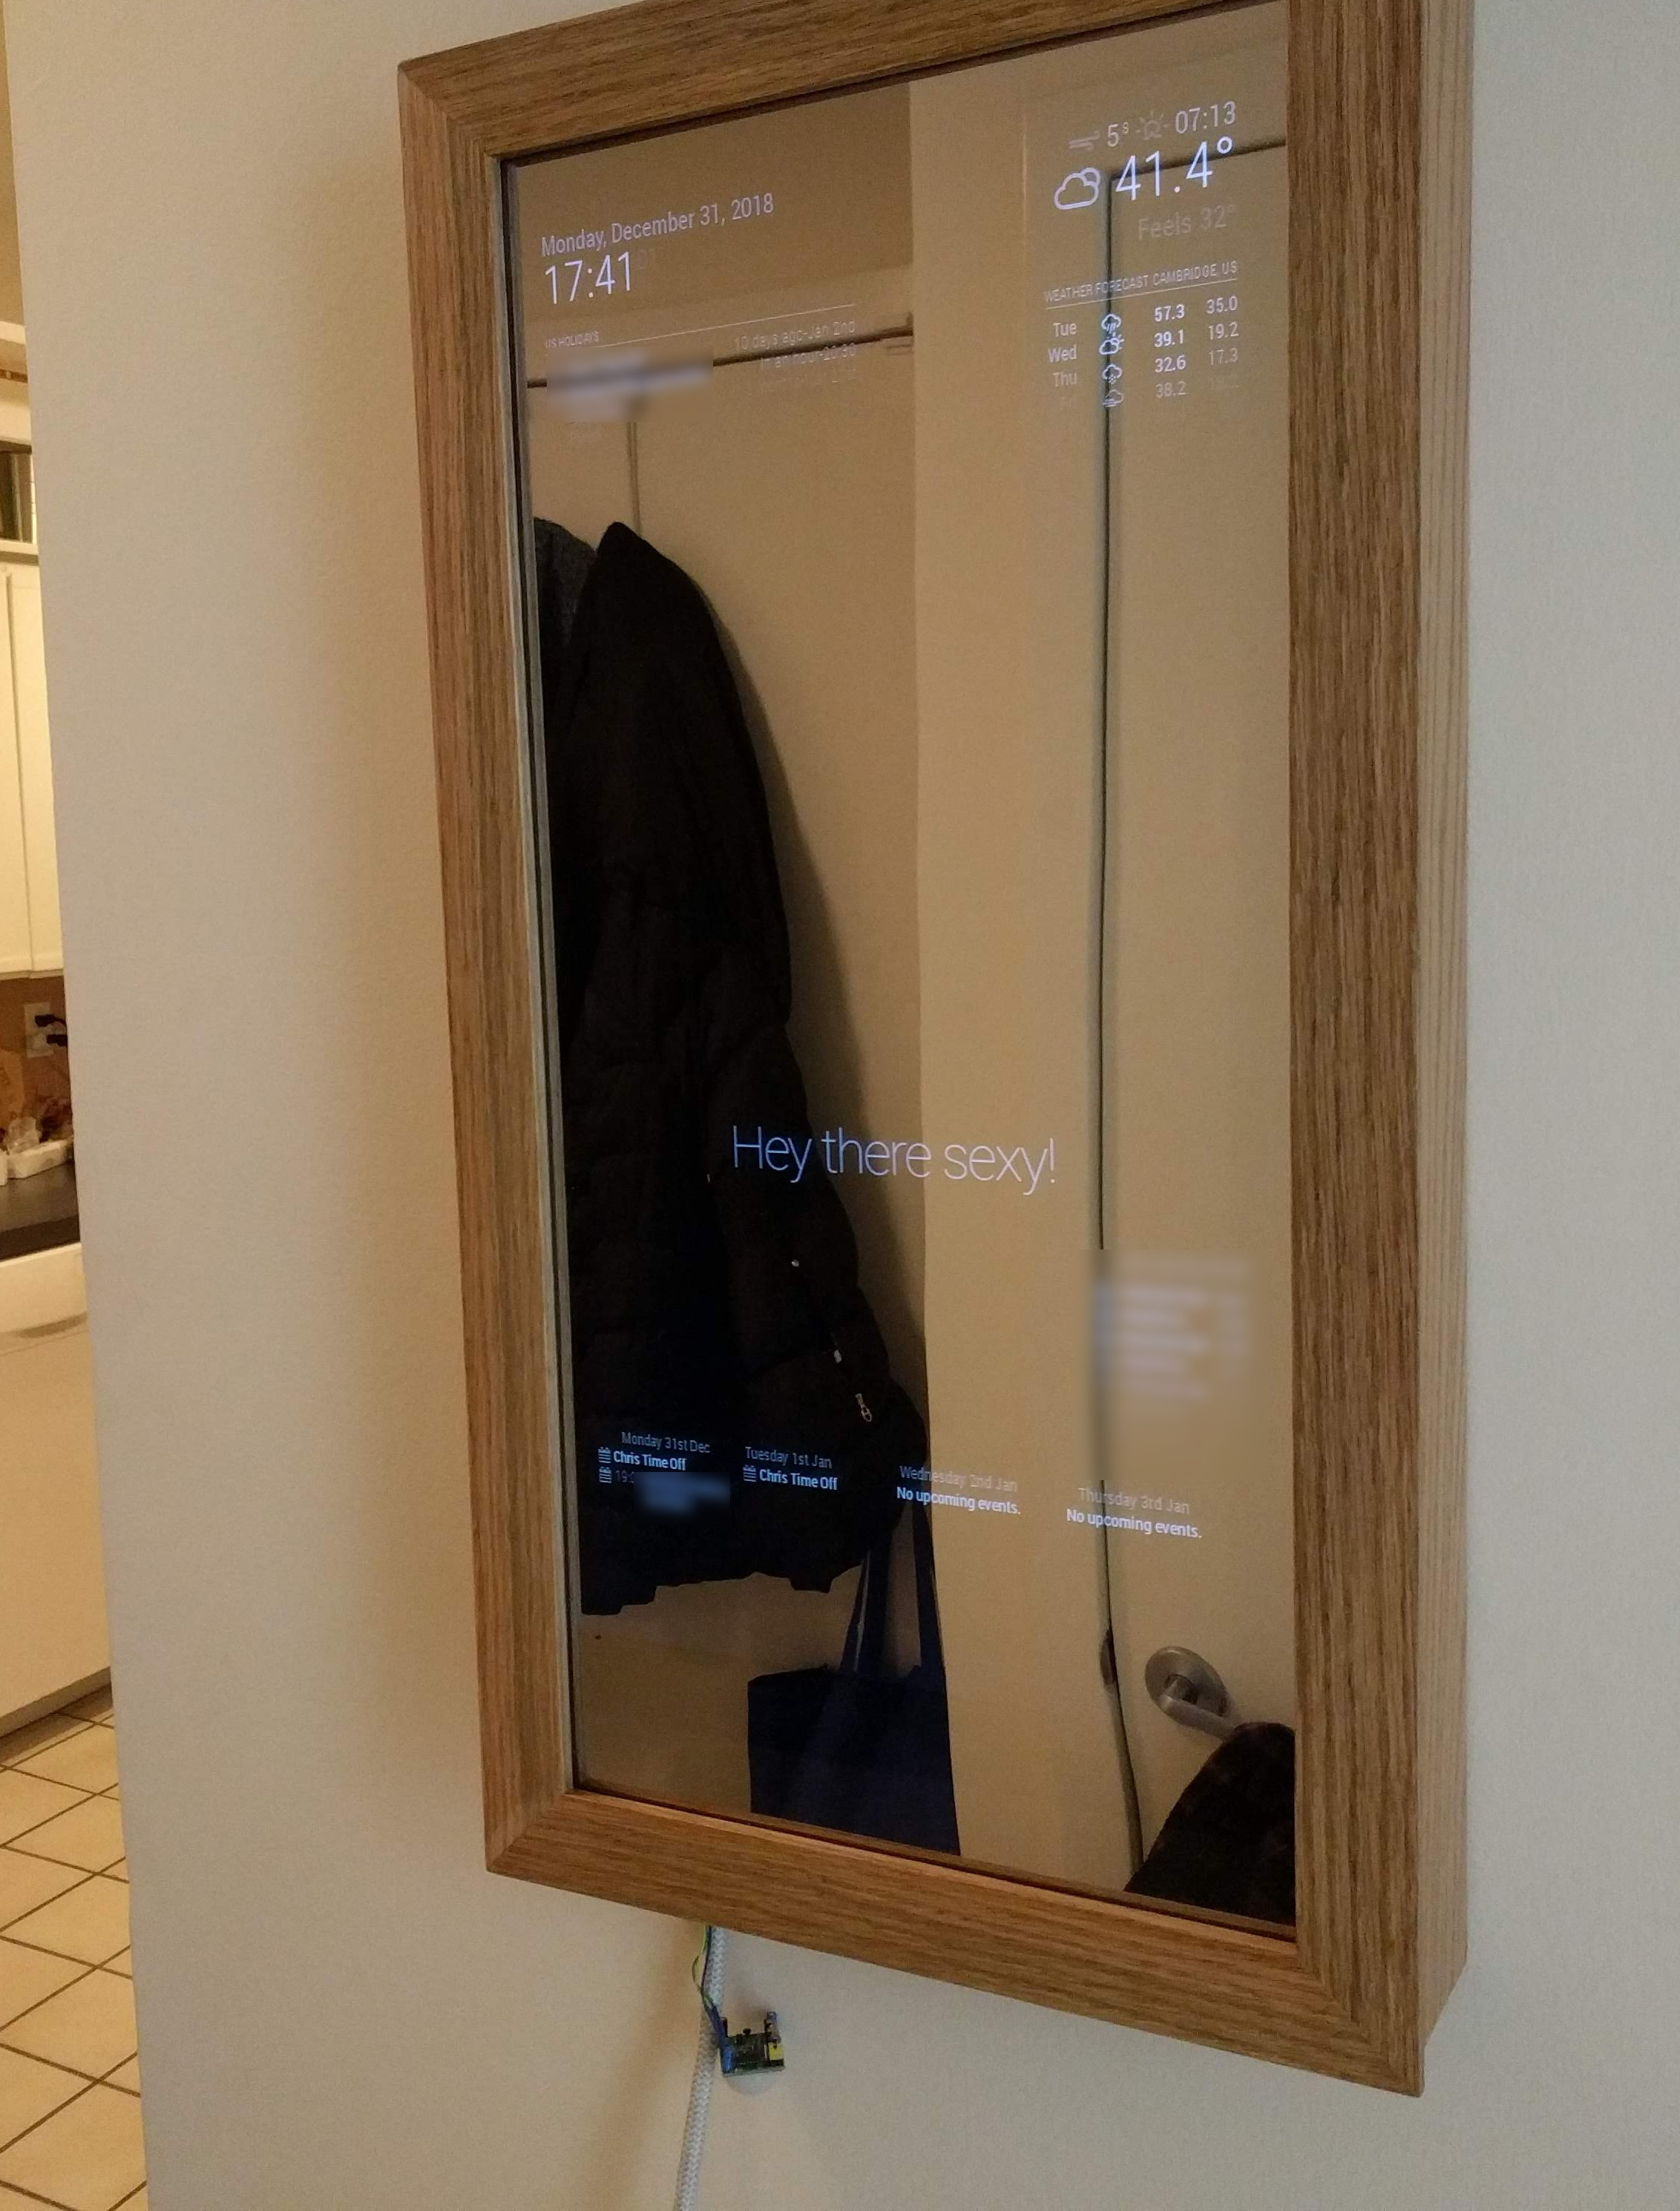
My configuration is pretty close to out-of-the-box, except I tweaked some default settings for things like the clock and added my calendars.
I used these modules in addition to what MM2 came with out-of-the-box:
- Calendar Week
- Darksky Hourly Weather
- MBTA Times (Because I live in Boston)
PIR Motion Sensor
Here's my small python script to manage the PIR motion sensor to turn the monitor off after 5 minutes.
Please don't judge the code, it was quick and dirty, but does its job :) I connected my PIR sensor to pin 18
#!/usr/bin/env python
import RPi.GPIO as GPIO
import time
import subprocess

PIN_PIR=18

GPIO.setmode(GPIO.BCM)
GPIO.setup(PIN_PIR, GPIO.IN)

OFF_DELAY = 5 * 60
LAST_MOTION = time.time()
MONITOR_ON = True

def hasMotion():
    #print GPIO.input(PIN_PIR)
    return GPIO.input(PIN_PIR) > 0

def sh(cmd):
    print(cmd)
    subprocess.call(cmd.split())

def monitorOff():
    global MONITOR_ON
    sh('xset dpms force off')
    sh('vcgencmd display_power 0')
    MONITOR_ON = False

def monitorOn():
    global MONITOR_ON
    sh('vcgencmd display_power 1')
    time.sleep(5)
    sh('xset dpms force on')
    MONITOR_ON = True

def init():
    sh('xset s off')
    sh('xset -dpms')
    sh('xset s noblank')

def main():
    global LAST_MOTION
    global MONITOR_ON
    init()
    monitorOn()
    while True:
        if hasMotion():
            LAST_MOTION = time.time()
            if not MONITOR_ON:
                monitorOn()

        if MONITOR_ON and time.time() > LAST_MOTION + OFF_DELAY:
            monitorOff()


        time.sleep(0.5)

if __name__ == '__main__': main()
The Final Product
At this point, the PIR sensor just hangs out of the bottom. I mounted it on the wall with 2 screws that latched into the inner pocket-holes nicely. One of the screws is in a stud, but the other I used a fancy drywall mount that claims to hold 50 lbs. It seems pretty secure.
Conclusion
This was a fun and different project. If you want to do it, my recommendation would just be to dive in! I learned so much about wood working, and how to build around electronics in the process. I made mistakes (Bought the wrong wood initially.. stripped some screw holes.. my pencil lines are now permanently part of the wood), but ended up with a final product that I think looks and works great!